Maker tool marketing is heavy. There is always a "must-have" gadget, a "professional upgrade," a "you need this" YouTube video. Most of it is noise. Here are the 6 tools I actually use weekly and 4 commonly recommended ones I would skip.
The 6 tools worth buying
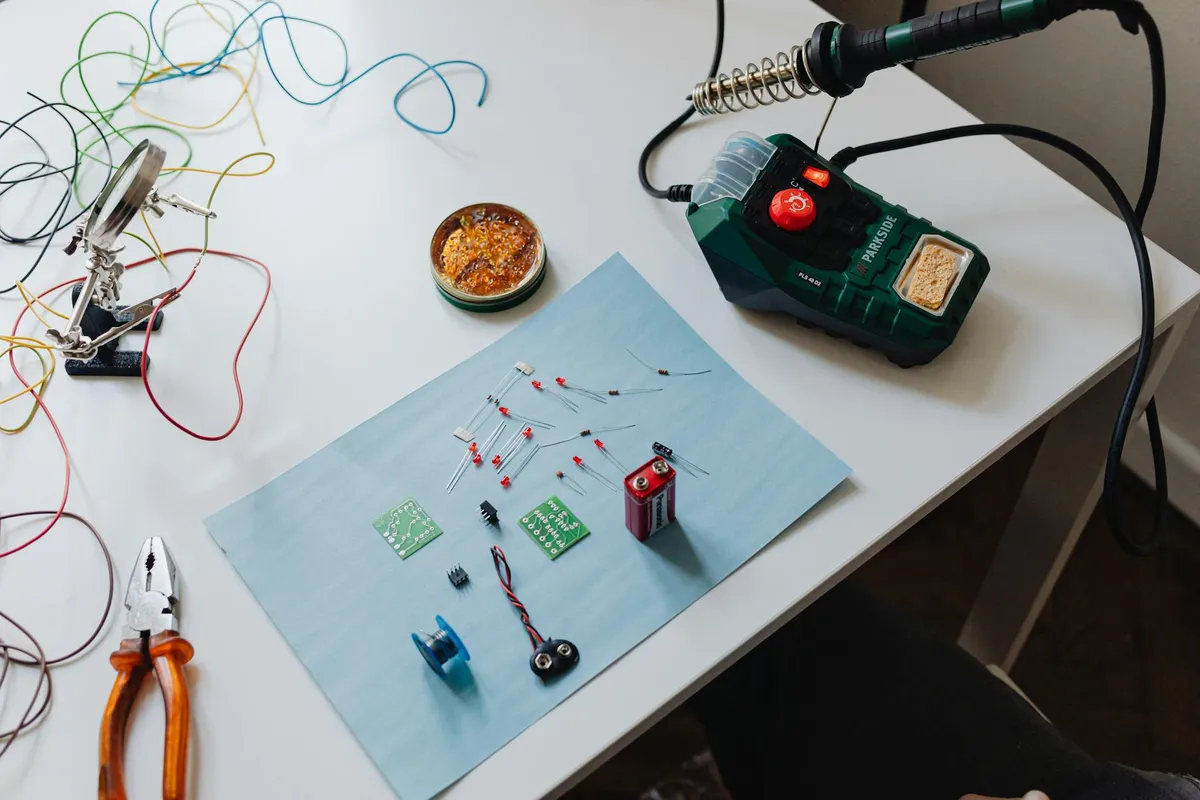
1. A real soldering iron with adjustable temperature (-100)
The single most important tool in maker electronics. The cheap $15 soldering iron is responsible for more failed projects than any other component.
What to look for: Adjustable temperature (essential), ceramic heating element (faster heating), interchangeable tips, temperature display.
What I use: Pinecil V2 ($30) for portable. Hakko FX-888D ($120) for the main bench. The Pinecil punches well above its weight.
Why it matters: A great soldering iron makes joints in 2 seconds that look perfect. A bad iron takes 8 seconds and looks awful. The difference compounds across hundreds of joints.
2. A digital multimeter (-80)
The diagnostic tool. You will use it constantly to check connections, measure voltage, debug circuits.
What to look for: Auto-ranging (much faster than manual), continuity beep, capacitance measurement, decent build quality.
What I use: Aneng AN8009 ($30). Excellent for the price. For pro work, Fluke is the standard but $200+.
Why it matters: Most debugging is "why isn't this working?" The multimeter tells you. Without it, you guess.
3. Helping hands or a small vice (-60)
Holds work in place while you solder. Sounds boring. Transforms soldering ergonomics.
What to look for: Magnifier lens included is useful. Multiple alligator clips on flexible arms.
What I use: A basic helping hands ($25) plus a PCB vice for board work ($40).
Why it matters: Trying to hold a wire in place with one hand while soldering with the other is a recipe for bad joints and frustration.
4. A logic analyzer (-100)
The tool you do not realize you need until you have a problem that nothing else can debug.
What it does: Reads digital signals over time, lets you see exactly what is happening on data lines, decodes common protocols (I2C, SPI, UART).
What I use: Saleae clone ($30) for basic work. Real Saleae ($250) for advanced.
Why it matters: When your I2C device is not responding and you have no idea why, the logic analyzer shows you exactly what bits are being sent. Without it, you guess for hours.
5. A bench power supply (-150)
Better than batteries or USB power for prototyping. Lets you set specific voltage, see current draw, protect against shorts.
What to look for: Variable voltage 0-30V, current limiting, current and voltage display.
What I use: Topward 6306D ($120). KORAD KA3005D ($90) is a popular alternative.
Why it matters: When developing a battery-powered project, you can simulate any battery voltage and see exactly how much current the circuit draws.
6. Quality wire strippers (-40)
Cheap wire strippers butcher wires. Quality ones strip cleanly without damaging the conductor.
What to look for: Self-adjusting versions (one tool fits multiple wire gauges), comfortable grip.
What I use: Knipex self-adjusting strippers ($35). Have used them for 5 years, still as good as new.
Why it matters: You strip wires constantly. A great stripper makes this trivial. A bad one makes it frustrating.
The 4 tools you can skip
1. An oscilloscope (until you actually need one)
The temptation: Oscilloscopes are cool. YouTube channels make them look essential.
The reality: Most maker projects do not need an oscilloscope. The logic analyzer covers digital signals. Multimeter covers voltage and current. The oscilloscope only matters for analog signal work.
Skip until: You are specifically working on analog circuits where waveform shape matters.
2. A 3D printer (unless you really want to print things)
The temptation: 3D printers seem essential for maker projects.
The reality: 3D printers are their own hobby with their own learning curve. You will spend more time tuning the printer than printing useful things initially.
Better alternative: Online 3D printing services (JLCPCB, PCBWay) print one-off items for a few dollars including shipping. Use them until you actually need printing capacity to justify a printer.
3. Specialty PCB design software ($$$ subscriptions)
The temptation: Altium Designer or other professional PCB tools.
The reality: KiCad is free, professional-grade, and used by serious engineers. Altium and similar are for working in teams with established workflows.
Skip: Anything that costs more than KiCad (which is $0) until you have a specific reason.
4. Brand-specific microcontroller "starter kits"
The temptation: Arduino, Raspberry Pi, ESP32 starter kits with curated components.
The reality: The kits include components you will never use plus a markup. Buy individual components as you need them. Dump the rest.
Better approach: Buy 3-4 individual ESP32 boards plus a basic component kit (resistors, capacitors, LEDs) separately. About 60% of the kit cost.
What I am NOT recommending strongly enough
Some less-glamorous tools that are surprisingly important:
- Good lighting at your workbench. Not a tool but transforms work quality.
- Magnification (loupe or microscope). SMD work requires it. Through-hole still benefits from it.
- Anti-static mat. Cheap insurance against frying components.
- Quality jumper wires. Cheap ones break constantly. Spend the extra few dollars.
- Component organizer drawers. The difference between "where is that resistor" and "found it instantly" is hours of cumulative time.
The total starter kit
If you wanted to set up a complete maker workbench:
- Soldering iron + accessories: $100
- Multimeter: $30
- Helping hands + PCB vice: $60
- Logic analyzer: $30
- Bench power supply: $90
- Wire strippers + cutters: $50
- Lighting + magnification: $80
- Component drawers + basic components: $80
Total: about $520.
This is substantial. It is also a one-time investment that lasts years. Spread across hundreds of projects, the per-project cost is minimal.
What I would buy first
If budget required prioritizing:
- Soldering iron (highest impact on work quality)
- Multimeter (essential for any debugging)
- Helping hands (transforms ergonomics)
- Wire strippers (used constantly)
- Logic analyzer (when you start hitting digital protocol issues)
- Bench power supply (when you have multiple projects needing varied voltages)
The takeaway
Maker tool marketing wants you to buy a bench full of expensive gear. You actually need 6 things. The 6 above cover almost any beginner-to-intermediate maker work.
Buy quality versions of these basics. Skip the gimmicks. Add specialized tools only when you have a specific project that requires them.
Your projects will be better. Your wallet will thank you. Your bench will be less cluttered.